You can assign statuses to a treatment plan case during the course of treatment to help you track what has gone on with the case, such as when the case was proposed, referred, accepted, or rejected. The procedures in a rejected case don't appear in Patient Chart, so Patient Chart is not cluttered with irrelevant procedures; while other statuses allow you to keep a record of the procedures you have recommended and presented to the patient. Since the status of a case can be searched once it's entered, this can really help with team communication to get everyone on the same page.
Note: Changing the statuses of treatment plan cases requires the "Treatment Plan, Edit" security right.
To change the status of a case
In Treatment Planner, in the Treatment Plan Case Setup section on the Navigation panel, select a treatment plan case.
Click
the Update Case Status button
![]() to view a menu.
to view a menu.
Note: This button is available only if a case is selected.
Select a status for the selected case:
Created - You can use this to specify that the case has been created. This is initial status of every treatment case.
Printed - You can use this to specify that the case detail has been printed.
Pre-Auth (Primary) - You can use this to specify that a primary pre-treatment estimate was sent for the case.
Pre-Auth (Secondary) - You can use this to specify that a secondary pre-treatment estimate was sent for the case.
Follow-up Made - You can use this to specify that your office followed up with the patient regarding the case.
Referred - You can use this to specify that the case was referred out to a doctor or specialist.
Proposed - You can use this to specify that the case was presented to the patient.
Accepted - You can use this to specify that the case was accepted by the patient.
Rejected - You can use this to specify that the case was rejected by the patient.
Note: Conditions that are associated with procedures in the case will be unlinked from those procedures.
Completed - You can use this to specify that the case was completed.
Note: Selecting Accepted, Rejected, and Completed will not only update the case's status but will cause a new default treatment plan case to be created. Selecting Completed will also set all the procedures in the case complete, and the case will no longer be able to be edited.
If applicable, do one of the following:
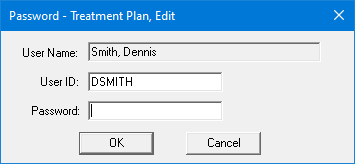
If the Password - Treatment Plan, Edit dialog box appears, user verification has been assigned to the "Treatment Plan, Edit" task. Do one of the following:
If your user account has been granted the "Treatment Plan, Edit" security right, enter your credentials in the User ID and Password boxes, and then click OK.
If your user account has not been granted the "Treatment Plan, Edit" security right, have a user with permission temporarily override this restriction so you can change the status of a treatment plan case this one time. The overriding user enters his or her credentials in the User ID and Password boxes and then clicks OK.
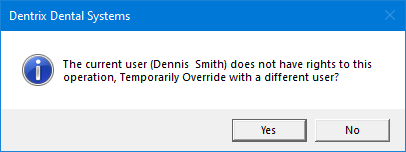
If a message appears, informing you that you do not have rights to this operation, your user account has not been granted the "Treatment Plan, Edit" security right. To have a user with permission temporarily override this restriction so you can change the status of a treatment plan case this one time, do the following:
On the message, click Yes.
In the Password - Treatment Plan, Edit dialog box, the overriding user enters his or her credentials in the User ID and Password boxes and then clicks OK.

The Update Current Case Status dialog box appears.
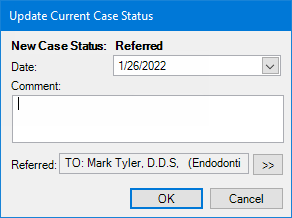
By default, today's date appears in the Date box, but you can change the date to associate with the status change. To specify a different date, do one of the following:
In the box, enter the correct date in a mm/dd/yyyy format.
To select a date, do the following:
Click the down-pointing arrow to view a month calendar.
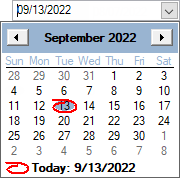
Navigate to the correct month using the left and right arrows.
Note: To quickly change the year and month, click the month-year at the top of the calendar, navigate to the correct year using the left and right arrows, and then click the correct month.
Click the correct day.
In the Comment box, enter any relevant comments about the status change.
If you are changing the status to Referred, to select the doctor or specialist to whom the patient is being referred, do the following:
Click the Referred
search button  .
.
The Select Referred To dialog box appears.
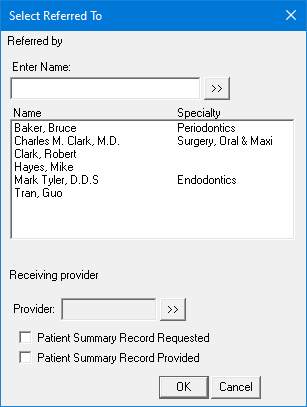
If
the list is long, to filter it by name, in the Enter
Name box, enter all or part of the referral destination name, and
then click the search button  .
.
In the list, select the correct referral destination.
To specify the receiving provider, do the following:
Click the Provider
search button  .
.
The Select Provider dialog box appears.
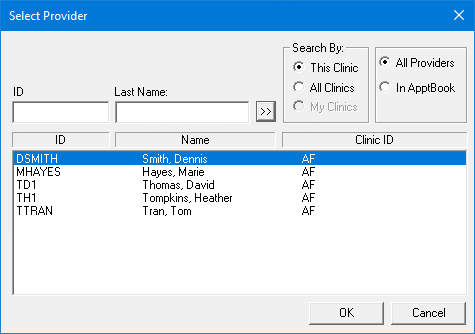
Either leave the ID and Last Name boxes empty to get a list of all providers, or enter all or part of a provider's ID or last name in the ID or Last Name box, respectively, to search for a provider.
Under Search By, select one of the following options: This Clinic, to search for the provider in the clinic that you are currently logged in to; All Clinics, to search for the provider in all clinics; or My Clinics, to search for the provider in the clinics to which you have been granted the "My Clinics, Select Provider " security right.
Notes:
The All Clinics option is available only if your user account has been granted the "View All Providers" security right for the Central clinic and if your user account has not been granted the "My Clinics, Select Provider" security right for the clinic that you are currently logged in to.
The My Clinics option is available only if your user account has been granted the "My Clinics, Select Provider" security right for at least one clinic and if your user account has not been granted the "View All Providers" security right for the Central clinic.
Either select the All Providers option to include providers who are associated with clinics (and who have a Log On User ID), or select the In ApptBook option to include providers who have been set up in Appointment Book.
Click
the search button  .
.
The matching primary and secondary providers appear in the list.
Select the correct provider.
Click OK.
If a patient summary has been requested, select the Patient Summary Record Requested checkbox.
If a patient summary has been provided, select the Patient Summary Record Provided checkbox.
Click OK.
Click OK.